|
|
|
|
|
|
|
|
|
|
|
|
|
|
|
|
|
|
|
|
|
|
|
|
|
|
|
|
|
|
|
|
|
|
|
|
|
|
|
|
|
|
|
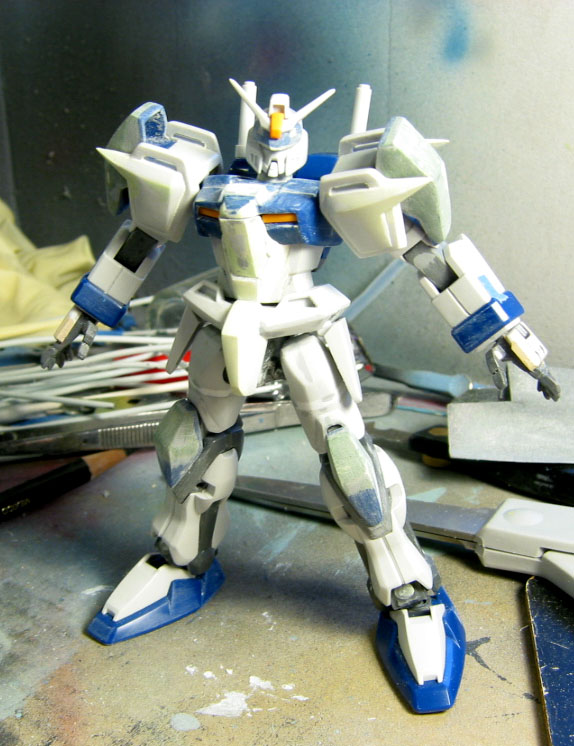
GAT-X102
Duel Gundam
Build-up
Bandai
- 1/144 HG Duel
|
|
|
|
|
|
|
|
|
|
|
|
|
|
|
|
|
|
|
|
|
|
|
|
|
|
|
|
|
|
|
|
|
|
|
|
|
|
|
|
|
|
Ideas/Plans:
Basically, I want to mod the structure and the build of
the Duel. I want it to look better, but not drift away
from the actual anime accuracy (of course, it's not too
accurate to start with). This is not an attempt to make
it more anime accurate either, just make it look better
to my own eyes. Here's what I have so far:
|
|
|
 |
|
|
|
|
|
|
|
|
|
|
|
|
|
|
|
|
|
|
|
|
|
|
|
|
|
|
|
|
|
|
|
|
|
|
|
|
|
|
|
|
|
|
|
|
|
|
|
|
|
|
|
|
|
|
|
|
|
|
|
|
|
|
|
|
|
|
|
|
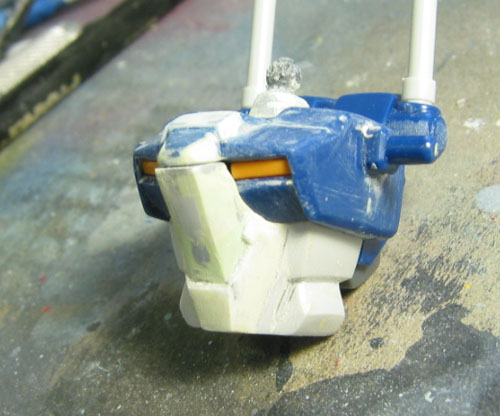
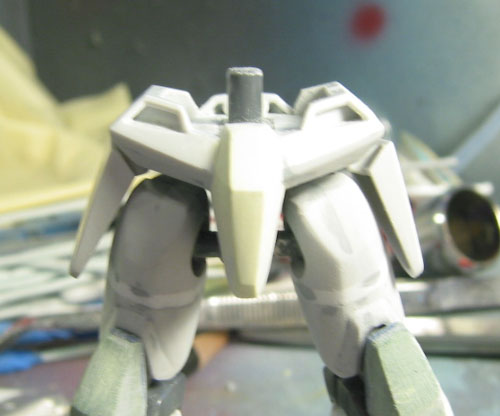
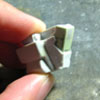
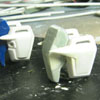
Chest/Torso:
Here's where most of the work came in. I first reshaped
the torso with poly putty(pic1), and then added styrene
to get the basic shape (pic2). Afterwards, I applied more
poly putty and finalized the shape. I had a bit of trouble
getting the chest to fit onto the torso right, but with
the help of petroleum jelly (vaseline) I was able to "mold"
the poly putty to the chest, allowing me to snap that on
and off anytime. Of course, that method is for epoxy putty,
however, it ended up working in my case.
The chest was piece that sticks out right about the cockpit
area was lengthened and strengtened a bit to match the torso.
I used styrene sheet there to bulk it up a bit too. I also
buffed up the neck a bit and made it taller, the stock neck
was those rubber P's which didn't allow the head much room. |
|
|
|
 |
|
 |
|
|
|
|
|
|
|
|
|
|
|
|
|
|
|
|
|
 |
|
 |
|
|
|
|
|
|
|
|
|
|
|
|
|
|
|
|
|
|
|
|
|
|
|
|
|
|
|
|
|
|
|
|
|
|
|
|
|
|
|
|
|
|
|
|
|
|
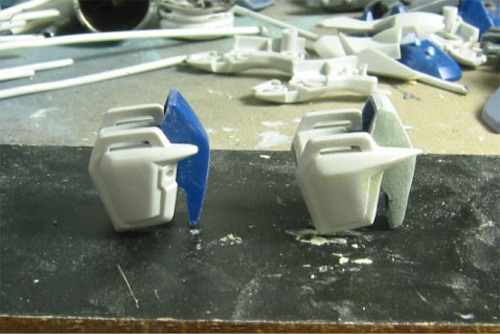
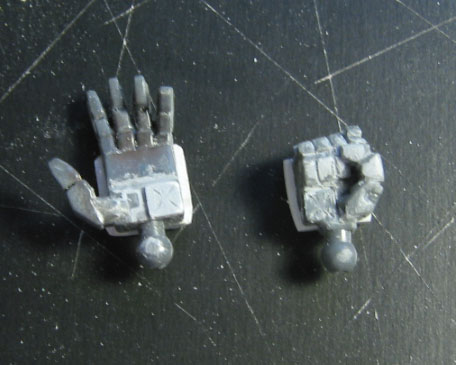
Shoulders/Arms:
Well, the shoulder definetely needed some work. They looked
so weak to me. So, I added some styrene sheet to the shoulder
fin to help guide the poly putty I used to lengthen it.
So, the fin was lengthened, then I used my X-acto to cut
away at the shoulder into the shape I wanted it. Sanded
it a bit, added some more poly putty, sanded it a bit
more, and Wah-La! The shoulder. Then I just used epoxy
putty to bulk up the side shoulder gaurd. Also, I did
a bit of work on the hands. I modded the fist that holds
the gun to look better (hopefully it looks better...).
Then, I went and took off the open-palm hands from my
GP03, and from there did a little scribing to replicate
the Duel hands.
|
|
 |
|
 |
|
|
|
|
|
|
|
|
|
|
|
|
|
|
|
|
|
|
|
|
 |
|
|
|
|
|
|
|
|
|
|
|
|
|
|
|
|
|
|
|
|
|
|
|
|
|
|
|
|
|
|
|
|
|
|
|
|
|
|
|
|
|
|
|
|
|
|
|
|
|
|
|
|
|
|
|
|
|
|
|
 |
|
|
|
|
|
|
|
|
|
|
|
|
|
|
|
|
|
|
|
|
|
|
|
|
|
|
Legs/Crotch:
Not too much work here...Basically I bulked up the knee
cap a bit. I used epoxy putty there. Then I lengthened the
upper leg. It just looked to stubby for me personally, so
I decided to lengthen it by 2 mm. I always thought a flat
hexagonal shape for a crotch looked to wierd, so I reshaped
that entire area. |
|
|
|
|
|
|
|
|
|
|
|
|
|
|
|
|
|
|
|
|
|
|
|
|
|
|
|
|
|
|
|
|
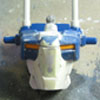
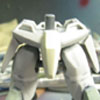
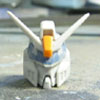
Head: I made some minor modifications to the head. It
was a paing to work with since the face did not come as
a seperate piece. I just shaped the face a bit with the
knife. I also did some work on the visor, I angled it downward
more to cover the eyes up a bit. Then, I also bulked up
the weak-ass chin. Lastly, I carved out a bit out of the
inside giving the head more rotation. Also, I fixed the
way too tall "thingy" above the V-fin...whatever
it's called. |
|
|
|
|
|
|
|
|
|
|
|
|
|
|
|
|
|
|
|
 |
|
|
|
|
|
|
|
|
|
|
|
|
|
|
|
|
|
|
|
|
|
|
|
|
|
|
|
|
|
|
|
|
|
|
|
|
|
|
|
|
|
|
|
|
|
|
|
|
|
|
|
|
|
|
|
|
|
|
|
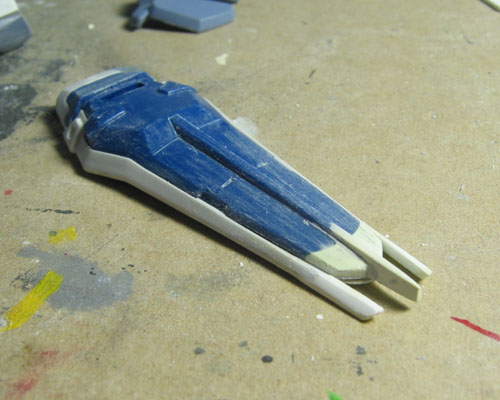
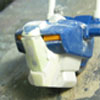
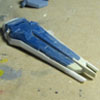
Weaponry/Acessories: Well, the Duel doesn't come with
much other than a gun and a shiled. But the shield looked
pretty weak. Too short and stubby. Not much of a defined
point. So I lengthened the shield with a combination of
plastic sheet and polyester putty. Then I fixed the base
up by using plastic sheet. Instead of going with the ovalish
indented pattern on the back of the shield, I just used
a scriber to scribe out the lines. I tried the other way,
and it looked a bit wierd to me. Then, I used more plastic
sheet and more polyester putty to lengthen the three points
at the bottom of the shield. This was a pain because the
points kept snapping! Arggh! |
|
|
|
 |
|
|
|
|
|
|
|
|
|
|
|
|
|
|
|
|
|
|
|
|
|
|
|
|
|
|
|
|
|
|
|
|
|
|
|
|
|
|
|
|
|
|
|
|
|
|
|
|
Assault
Shrowd Build-up >> |
|
Paint
Process>> |
|
|
|
|
|
|
|
|
|
|
|
|
|
|
|
|
|
|
|
|
|
|
|
|
|
|
|
|
|
|
|
|
|
|
|
|
|
|
|
|
|
|
|
|
|
|
|
|
|
Completed
Images >> |
|
|
|
|
|
|
|
|
|
|
|
|
|
|
|
|
|
|
|
|
|
|
|
|
|
|
|
|
|
|
|
|
|
|
|
|
|
|
|
|
|
|
|
|
|
|